This article was originally posted on the Codemagic Blog.
Unit tests and widget tests are a great way of testing classes, functions and widgets in isolation. However, it is just as important to test that all these moving parts work together as a whole.
And when dealing with complex apps with many screens, it is hard and error-prone to manually test multiple user journeys.
Integration tests help us automate this process, and we can use them to test our Flutter apps on a real device or emulator.
So in this article, we will learn how to write integration tests using Flutter driver, and see how they differ from widget tests.
And we will use them to test a user journey for an existing open source app built with Flutter & Firebase.
Finally, we will see how to run them with Codemagic, either on an emulator, or a real device powered by the AWS Device Farm.
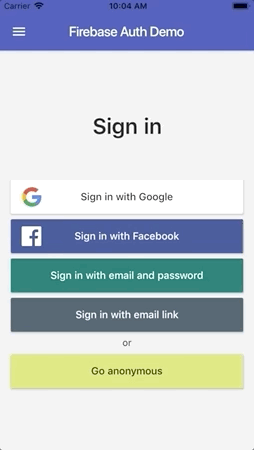
Application overview
We will use this open source app as an example:
This app shows how to use different sign-in methods to authenticate with Firebase. It already implements a sign-in and sign-out flow that is composed of four steps:

This flow is a good candidate for an automated integration test (UI test to be precise, more on this below).
So our goal is to write a test that can loop through the four steps above by interacting with the UI, and verify that the correct widgets are in place after every interaction.
And because integration tests run with Flutter driver, we will be able to see the app run on the simulator as the test executes:
Integration tests or UI tests?
Our application uses Firebase authentication to sign-in the user. And in general, you apps will be using various services to talk to the network or other external inputs (e.g. location updates).
So, should integration tests run with a real or mocked network service?
While there is value in testing the whole product end-to-end, there are also some risks:
- you don't want to pollute the production environment with network requests from test code.
- testing with the real network service can be slow at best, and unreliable at worst.
So in my apps I always mock the network service. This gives me a more controlled environment where I can stub network calls, and even decide how long they should take to respond. This makes my tests more predictable and reliable.
Strictly speaking, this means that I'm writing UI tests. Because I'm mimicking the behaviour of real users, by simulating their interaction with the app via gestures. For clarity, I will stick with the term integration test for the rest of the article, as this is how they are called in Flutter.
With that said, let's get back to our example.
Mocking the authentication service
In practice, we want to run an integration test for the entire app, so there needs to be a way to inject a mock authentication service at the top of the widget tree.
In my example project, I have accomplished this by defining this enum:
enum AuthServiceType { firebase, mock }
And when I create the Flutter app, I inject the desired AuthServiceType like so:
void main() => runApp(MyApp());

class MyApp extends StatelessWidget {
  // [initialAuthServiceType] is made configurable for testing
  const MyApp({this.initialAuthServiceType = AuthServiceType.firebase});
  final AuthServiceType initialAuthServiceType;

  @override
  Widget build(BuildContext context) {
    // top-level providers and MaterialApp here
    // create real or mock authentication service based on initialAuthServiceType.
  }
}
With this setup, the production app will always use the Firebase authentication service, while test code can use a mock service instead.
And in general, I recommend injecting all service classes at the top of the widget tree (above MaterialApp), so that it is easier to swap them out when configuring widget and integration tests.
With this in mind, we're ready to add our integration tests.
Adding integration tests with Flutter Driver
According to the official documentation, integration tests require two steps:
- deploy an instrumented application to a real device or emulator.
- “drive” the application from a separate test suite, checking to make sure everything is correct along the way.
This is different to how widget tests are run, where we use a test environment that is much simpler (and faster) than a full-blown UI system.
NOTE: If you're not familiar with integration tests, I recommend reading An introduction to integration testing from the Flutter documentation.
Step one is to add the flutter_driver package to the pubspec.yaml file:
dev_dependencies:
  flutter_driver:
    sdk: flutter
And to create our integration tests, we can define a project-level folder with two files:
test_driver/
  app_test.dart
  app.dart
Inside the app.dart file, we can add the following:
// project-specific imports
import 'package:firebase_auth_demo_flutter/main.dart';
import 'package:firebase_auth_demo_flutter/services/auth_service_adapter.dart';
// flutter-specific imports
import 'package:flutter/material.dart';
import 'package:flutter_driver/driver_extension.dart';

void main() {
  // This line enables the extension.
  enableFlutterDriverExtension();

  // Call the `main()` function of the app, or call `runApp` with
  // any widget you are interested in testing.
  runApp(MyApp(initialAuthServiceType: AuthServiceType.mock));
}
Note how we're passing AuthServiceType.mock when we create the MyApp widget.
Then we can start implementing the app_test.dart file, by adding the standard boilerplate code for the FlutterDriver:
// Imports the Flutter Driver API.
import 'package:flutter_driver/flutter_driver.dart';
import 'package:test/test.dart';

void main() {
  FlutterDriver driver;

  // Connect to the Flutter driver before running any tests.
  setUpAll(() async {
    driver = await FlutterDriver.connect();
  });

  // Close the connection to the driver after the tests have completed.
  tearDownAll(() async {
    if (driver != null) {
      driver.close();
    }
  });
}
After this, we can add a quick test to check the health status of our Flutter Driver extension. It's a good idea to run this before any other tests.
test('check flutter driver health', () async {
  final health = await driver.checkHealth();
  expect(health.status, HealthStatus.ok);
});
Credit: Darshan Kawar, who wrote this good article about Testing Flutter UI with Flutter Driver.
Next, we can add a method that we will use to add a short delay between UI interactions. As we will see, this is used only for demo purposes:
Future<void> delay([int milliseconds = 250]) async {
  await Future<void>.delayed(Duration(milliseconds: milliseconds));
}
With this in place, we can start writing the first test:
test('sign in anonymously, sign out', () async {
  // 1. find and tap anonymous sign in button
  final anonymousSignInButton = find.byValueKey(Keys.anonymous);
  // 2. check to fail early if the auth state is authenticated
  await driver.waitFor(anonymousSignInButton);
  // 3. add small delay for demo recording
  await delay(750);
  // 4. interact with UI
  await driver.tap(anonymousSignInButton);
});
On step 1, we use the find object to get a handle to a widget by key.
Note: this is not the same finder used with widget tests, and the value passed to byValueKey needs to be a String, not a Key object.
In fact, things will break if we use this import in the integration tests:
import 'package:flutter_test/flutter_test.dart';
Instead, we should use only the symbols defined in the flutter_driver package:
import 'package:flutter_driver/flutter_driver.dart';
And since we're referencing widgets by key, I defined a Keys class to avoid duplication and hard-coded strings across the production and test code:
class Keys {
  // list of widget keys that need to be accessed in the test code
  static const String anonymous = 'anonymous';
  static const String logout = 'logout';
  static const String alertDefault = 'alertDefault';
  static const String alertCancel = 'alertCancel';
}
Accordingly, in my sign-in page I will have a button, defined like this:
SignInButton(
  key: Key(Keys.anonymous),
  text: Strings.goAnonymous,
  color: Colors.lime[300],
  textColor: Colors.black87,
  onPressed: isLoading ? null : () => _signInAnonymously(context),
),
Let's get back on track. Here's our test once again:
test('sign in anonymously, sign out', () async {
  // 1. find and tap anonymous sign in button
  final anonymousSignInButton = find.byValueKey(Keys.anonymous);
  // 2. check to fail early if the auth state is authenticated
  await driver.waitFor(anonymousSignInButton);
  // 3. add small delay for demo recording
  await delay(750);
  // 4. interact with UI
  await driver.tap(anonymousSignInButton);
});
In step 2, we ask the driver to wait until we find the anonymous sign-in button. It is good practice to check this before any UI interaction takes place, to ensure that we're in the initial sign-in page and we're showing the correct buttons.
In fact, we should always keep in mind that the application state can change across tests. In other words, multiple integration tests are "sharing" the same application, and can introduce side effects if each test doesn't return to the initial application state.
Step 3 adds a small delay, and step 4 dispatches a tap gesture to the button.
As a result, the (mock) authentication service is called, with a request to sign-in the user. All the mock service does is to wait for a short delay, and change its internal state to indicate that the user is signed-in. When this happens, the application updates itself and shows the home page:

All good so far, but our test implementation is not complete yet.
Next, we want to find and tap the logout button:
// find and tap logout button
final logoutButton = find.byValueKey(Keys.logout);
await driver.waitFor(logoutButton);
await delay(750); // for video capture
await driver.tap(logoutButton);
This works just like our previous code. We reference a button by key, and wait for the driver to find it. Once the home page is presented, all UI animations are complete, and we return from the first await call.
And once we have a logout button, we can tap on it.
In this specific flow, the app shows a dialog asking for logout confirmation:

And by now, we know how to deal with this:
// find and tap confirm logout button
final confirmLogoutButton = find.byValueKey(Keys.alertDefault);
await driver.waitFor(confirmLogoutButton);
await delay(750); // for video capture
await driver.tap(confirmLogoutButton);
After we tap on the logout confirmation button, another call is made to sign-out with the mock authentication service. In turn, this updates the authentication status.
Finally, we want to check that we're back to the sign-in page. And we can complete our test with one final line:
// try to find anonymous sign in button again
await driver.waitFor(anonymousSignInButton);
All in all, this is the code for the entire test:
test('sign in anonymously, sign out', () async {
  // find and tap anonymous sign in button
  final anonymousSignInButton = find.byValueKey(Keys.anonymous);
  // Check to fail early if the auth state is authenticated
  await driver.waitFor(anonymousSignInButton);
  await delay(750); // for video capture
  await driver.tap(anonymousSignInButton);

  // find and tap logout button
  final logoutButton = find.byValueKey(Keys.logout);
  await driver.waitFor(logoutButton);
  await delay(750); // for video capture
  await driver.tap(logoutButton);

  // find and tap confirm logout button
  final confirmLogoutButton = find.byValueKey(Keys.alertDefault);
  await driver.waitFor(confirmLogoutButton);
  await delay(750); // for video capture
  await driver.tap(confirmLogoutButton);

  // try to find anonymous sign in button again
  await driver.waitFor(anonymousSignInButton);
});
The last thing to do is to run our integration test:
flutter drive --target=test_driver/app.dart
And then, we can sit back and relax as Flutter driver runs the test on our simulator (look, no hands 😀):
For reference, this is a stripped-out log of the output from Flutter driver:
Starting application: test_driver/app.dart
Running Xcode build...

 ├─Assembling Flutter resources...                          10.8s
 └─Compiling, linking and signing...                        12.0s
Xcode build done.                                           27.0s
Configuring the default Firebase app...
flutter: Observatory listening on http://127.0.0.1:62531/q6q6Nbol1fU=/
Configured the default Firebase app __FIRAPP_DEFAULT.

[info ] FlutterDriver: Connecting to Flutter application at http://127.0.0.1:62531/q6q6Nbol1fU=/
[trace] FlutterDriver: Isolate found with number: 844330546624811
[trace] FlutterDriver: Isolate is paused at start.
[trace] FlutterDriver: Attempting to resume isolate
[trace] FlutterDriver: Waiting for service extension
[info ] FlutterDriver: Connected to Flutter application.
00:01 +0: check flutter driver health
00:01 +1: sign in anonymously, sign out
00:07 +2: (tearDownAll)
00:07 +2: All tests passed!
Stopping application instance.
Note how the test took 7 seconds to run. This would run faster if we removed the artificial delays. But it's worth noting that running integration tests takes longer than widget and unit tests.
Still, we can now write integration tests that cover almost all the user flows in our app, which is great! 🚀
And our testers will be super-delighted, as they will no longer need to do this by hand. 🙏

Running on Codemagic
Having unit, widget and integration tests is good.
But it's even better to run them automatically every time we open or update a pull request.
And this is where Codemagic comes in.
Codemagic offers a user-friendly UI that makes it easy to automate the testing and delivery of our apps.
And when it comes to testing, we can configure our builds to run Flutter tests (unit and widget) and Flutter Driver tests (integration):

Not only that, but we can choose to run on the iOS simulator, Android emulator, and even on a real device running on the AWS Device Farm.
And because end-users will be using your apps on real devices, running automated tests in this way is very important.
So for this project, I have setup an AWS account, and registered an AWS access key ID and AWS secret access key as outlined here.
And after configuring this on Codemagic, I ran my tests, and got the desired results for the integration tests in my build log:
Run 'sylph run 2019-10-22 01:09:31.259' completed 1 of 1 jobs.
  Result: PASSED
  Device minutes: 7.98 (5.57 metered).
  Counters:
    skipped: 0
    warned: 0
    failed: 0
    stopped: 0
    passed: 3
    errored: 0
    total: 3

Downloading artifacts...
Downloading artifacts to /tmp/sylph_artifacts/sylph_run_2019-10-22_01_09_31.259/test_concurrent_runs/android_pool_1/Google_Pixel_2-Google_Pixel_2-8.0.0
results=[{result: true}]
Concurrent runs completed.
Sylph run completed in 12m:32s:975ms.
Sylph run 'sylph run 2019-10-22 01:09:31.259' succeeded.
Conclusion
In this article we have seen how to setup and write integration tests for our Flutter apps with Flutter Driver.
We have gained more insight into how integration tests work, and how they differ from widget tests.
And we have seen how to use them to test user flows, using my reference authentication demo app.
Finally, we have automated the entire process by setting up a workflow to run all the tests on Codemagic. And we have seen how to test on real devices with the AWS Device Farm.
And if we want to go further, we can even write integration tests to record the performance of our app. This way, we can ensure that the UI works smoothly on a variety of devices running on AWS Device Farm.
For more in-depth information on some of the topics covered in this article, I recommend reading the following resources:
- An introduction to integration testing
- Performance profiling
- Testing Flutter UI with Flutter Driver
- How to write an integration test in Flutter
- Practical guide: Flutter + Firebase + Codemagic
- Run Flutter integration tests on real devices with AWS Device Farm and Sylph
The full source code for the reference authentication demo is available on GitHub:
What do you think? Do you write integration tests for your Flutter apps, or plan to? Let me know on Twitter at @biz84.


