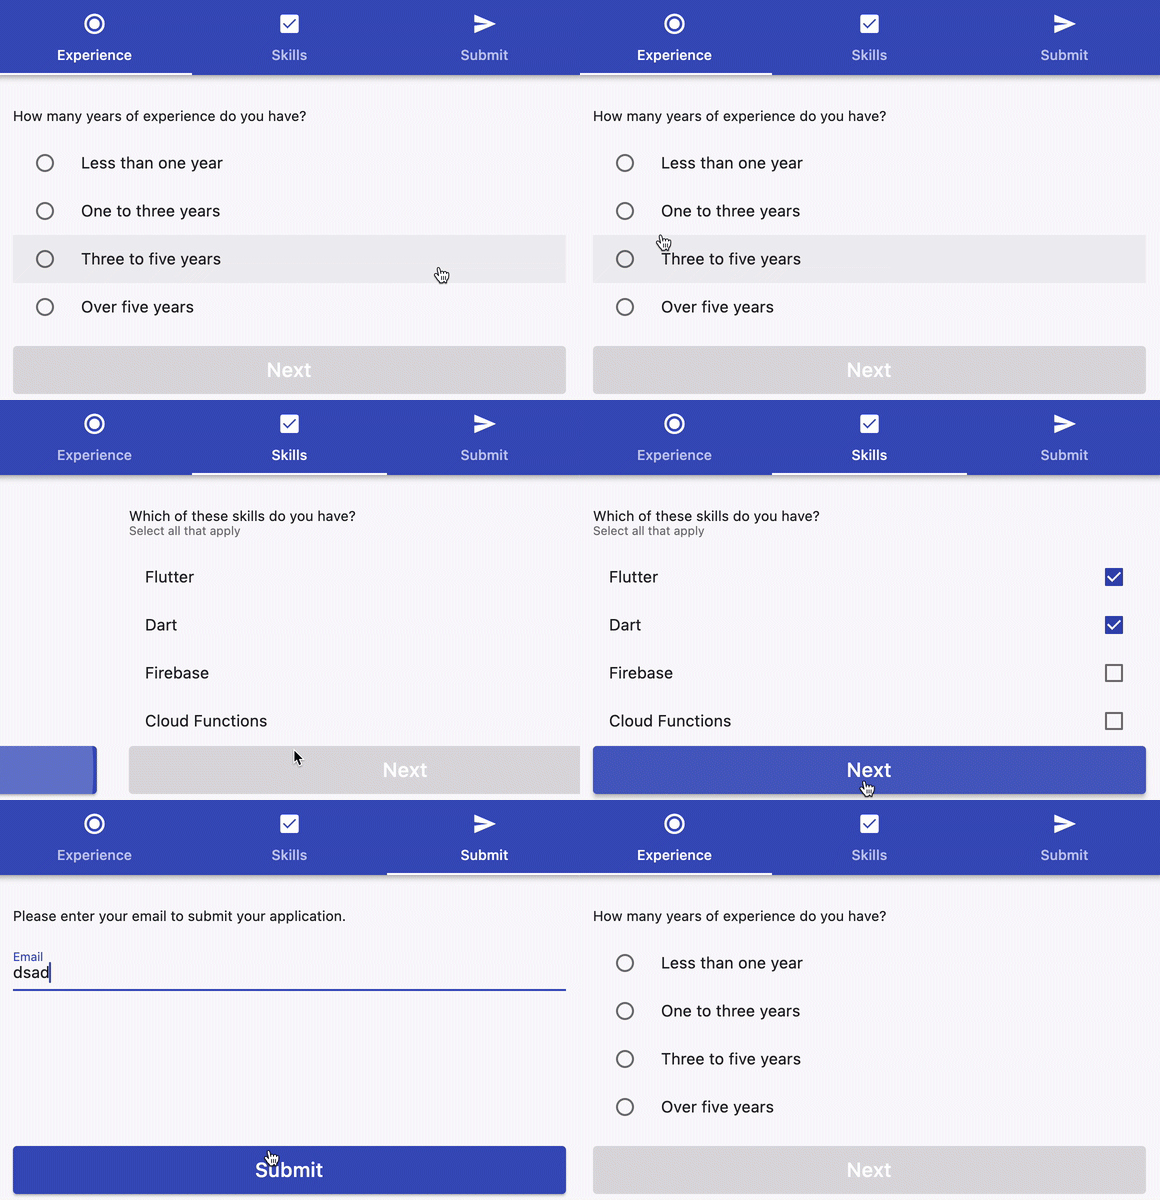
A common navigation pattern on mobile is to show multiple tabs with different pages inside them.
With Flutter, this is easily done with the TabBar widget, along with a TabController and a TabBarView.
But how do you navigate programmatically between tabs like this in Flutter?

Let's figure it out. 👍
As part of this, we will see how to:
- update the selected tab when a button is pressed.
- disable user interaction on the tab bar, so that we can guide the user through multiple tabs in order.
Flutter TabBar setup
Let's start by creating a StatefulWidget with a TabBar and a TabController:
// Just a standard StatefulWidget
class JobApplicationFlow extends StatefulWidget {
  const JobApplicationFlow({Key? key}) : super(key: key);

  @override
  _JobApplicationFlowState createState() => _JobApplicationFlowState();
}

// This is where the interesting stuff happens
class _JobApplicationFlowState extends State<JobApplicationFlow>
    with SingleTickerProviderStateMixin {
  // We need a TabController to control the selected tab programmatically
  late final _tabController = TabController(length: 3, vsync: this);

  @override
  Widget build(BuildContext context) {
    return Scaffold(
      appBar: AppBar(
        title: const Text('Job Application'),
        // Use TabBar to show the three tabs
        bottom: TabBar(
          controller: _tabController,
          tabs: const <Widget>[
            Tab(
              icon: Icon(Icons.radio_button_on, color: Colors.white),
              text: 'Experience',
            ),
            Tab(
              icon: Icon(Icons.check_box, color: Colors.white),
              text: 'Skills',
            ),
            Tab(
              icon: Icon(Icons.send, color: Colors.white),
              text: 'Submit',
            ),
          ],
        ),
      ),
    );
  }
}
Then, let's add a TabBarView to contain all the views (pages):
Scaffold(
  appBar: AppBar(...),
  body: TabBarView(
    controller: _tabController,
    children: [
      ExperiencePage(
        onNext: () => _tabController.index = 1,
      ),
      SkillsPage(
        onNext: () => _tabController.index = 2,
      ),
      SubmitPage(
        onSubmit: () => showCupertinoDialog(...),
      ),
    ],
  ),
)
In the code above, each page is a custom widget with some content and a button that triggers the onNext or onSubmit callback.
We can use each callback to change the index of the TabController. In turn, this updates the current view (page).
Disabling user interaction on the TabBar
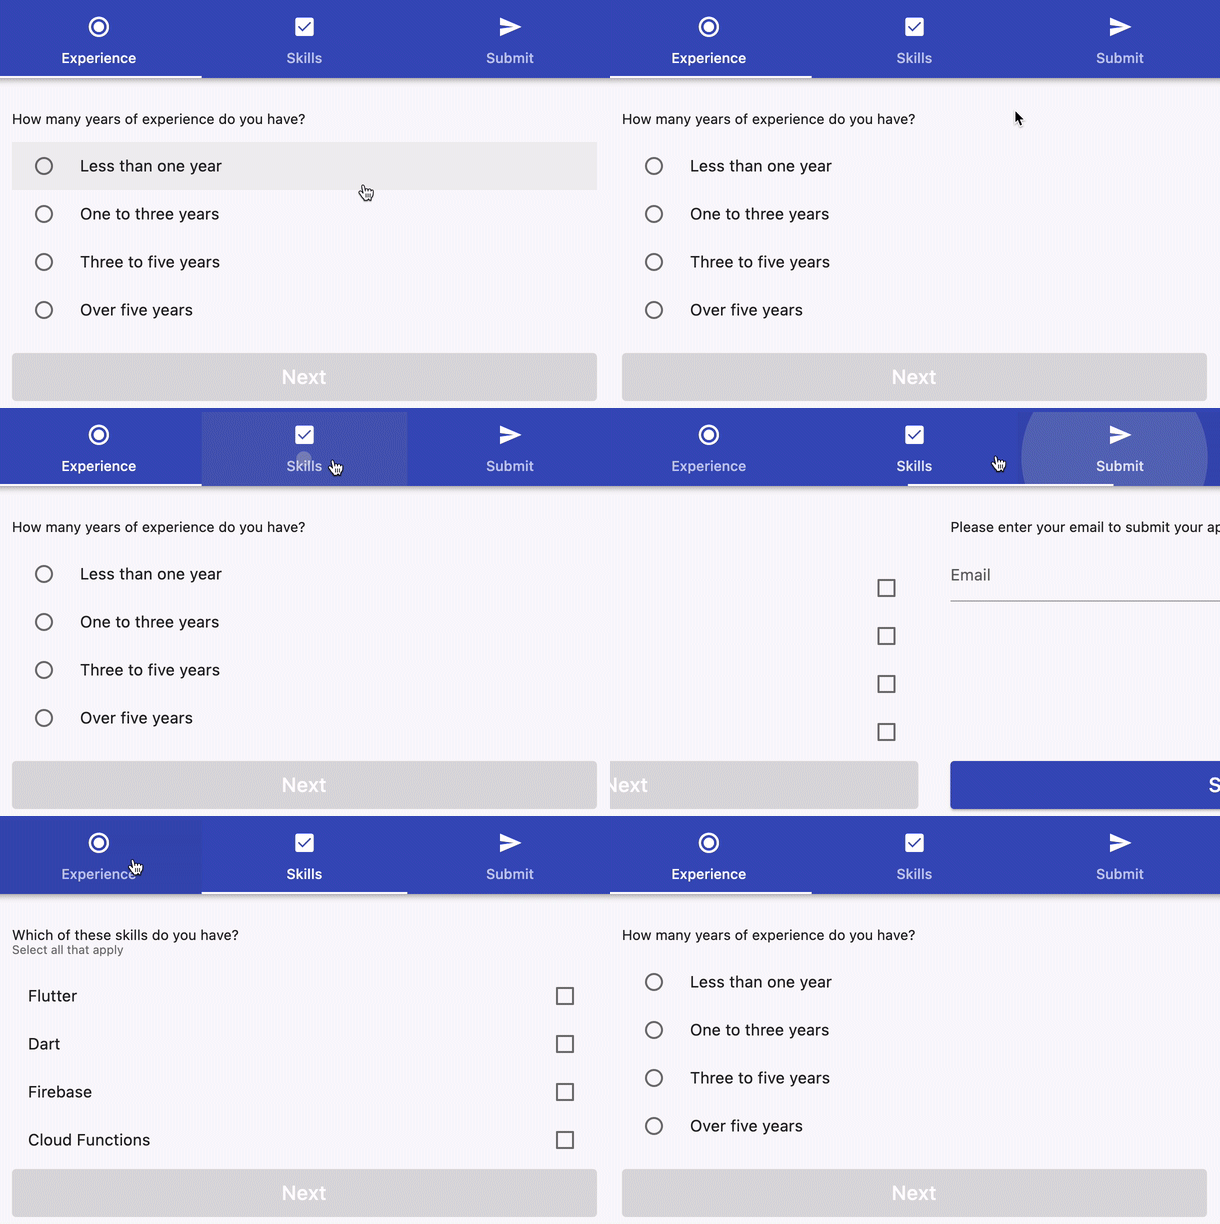
This works, but we can still navigate through tabs by tapping on them and this is not always desirable.
If we want to "force" the user through the pages in order, this is not ideal:

To address this, we can create a ReadOnlyTabBar that uses IgnorePointer to ignore all interactions with the tabs (as proposed in this StackOverflow thread):
// https://stackoverflow.com/a/57354375/436422
class ReadOnlyTabBar extends StatelessWidget implements PreferredSizeWidget {
  final TabBar child;

  const ReadOnlyTabBar({Key? key, required this.child}) : super(key: key);

  @override
  Widget build(BuildContext context) {
    return IgnorePointer(child: child);
  }

  @override
  Size get preferredSize => child.preferredSize;
}
Then, we can wrap the TabBar with this new widget:
AppBar(
  bottom: ReadOnlyTabBar(child:
    TabBar(...),
  ),
)
We should also make sure that we can't switch between tabs with interactive drag gestures. NeverScrollableScrollPhysics helps with that:
TabBarView(
  // make sure we can't switch tabs with interactive drag gestures
  physics: const NeverScrollableScrollPhysics(),
  controller: _tabController,
  children: [...],
)
And that's it! We have used TabController, TabBar, and TabBarView to create a multi-step user journey.
For bonus points, we can show a dialog and reset the TabController index to 0 when we press OK:
SubmitPage(
  onSubmit: () => showCupertinoDialog(
    context: context,
    builder: (_) {
      return CupertinoAlertDialog(
        title: const Text('Thank you'),
        content: const Text('Your application was submitted.'),
        actions: [
          CupertinoDialogAction(
            child: const Text('OK'),
            onPressed: () {
              // dismiss dialog
              Navigator.of(context).pop();
              _tabController.index = 0;
            },
          ),
        ],
      );
    },
  )
)
Here's the final result once again:

Conclusion
The Flutter TabBar and TabController classes give us convenient APIs that we can use to navigate between tabs, either interactively or programmatically.
This makes them ideal for breaking down complex input forms into smaller ones that the user can more easily navigate through.
You can find the full source code for this example on DartPad:
Happy coding!


