If we want to add authentication and a remote database to our Flutter apps, Firebase makes our life easy.
But in some cases, we want to run server-side code in response to some events, rather than performing complex logic on the client.
Examples of this include:
- calculate the total price when we update items in a shopping cart
- update the average rating score when we leave a review
- perform text moderation and remove swear words in a chat application
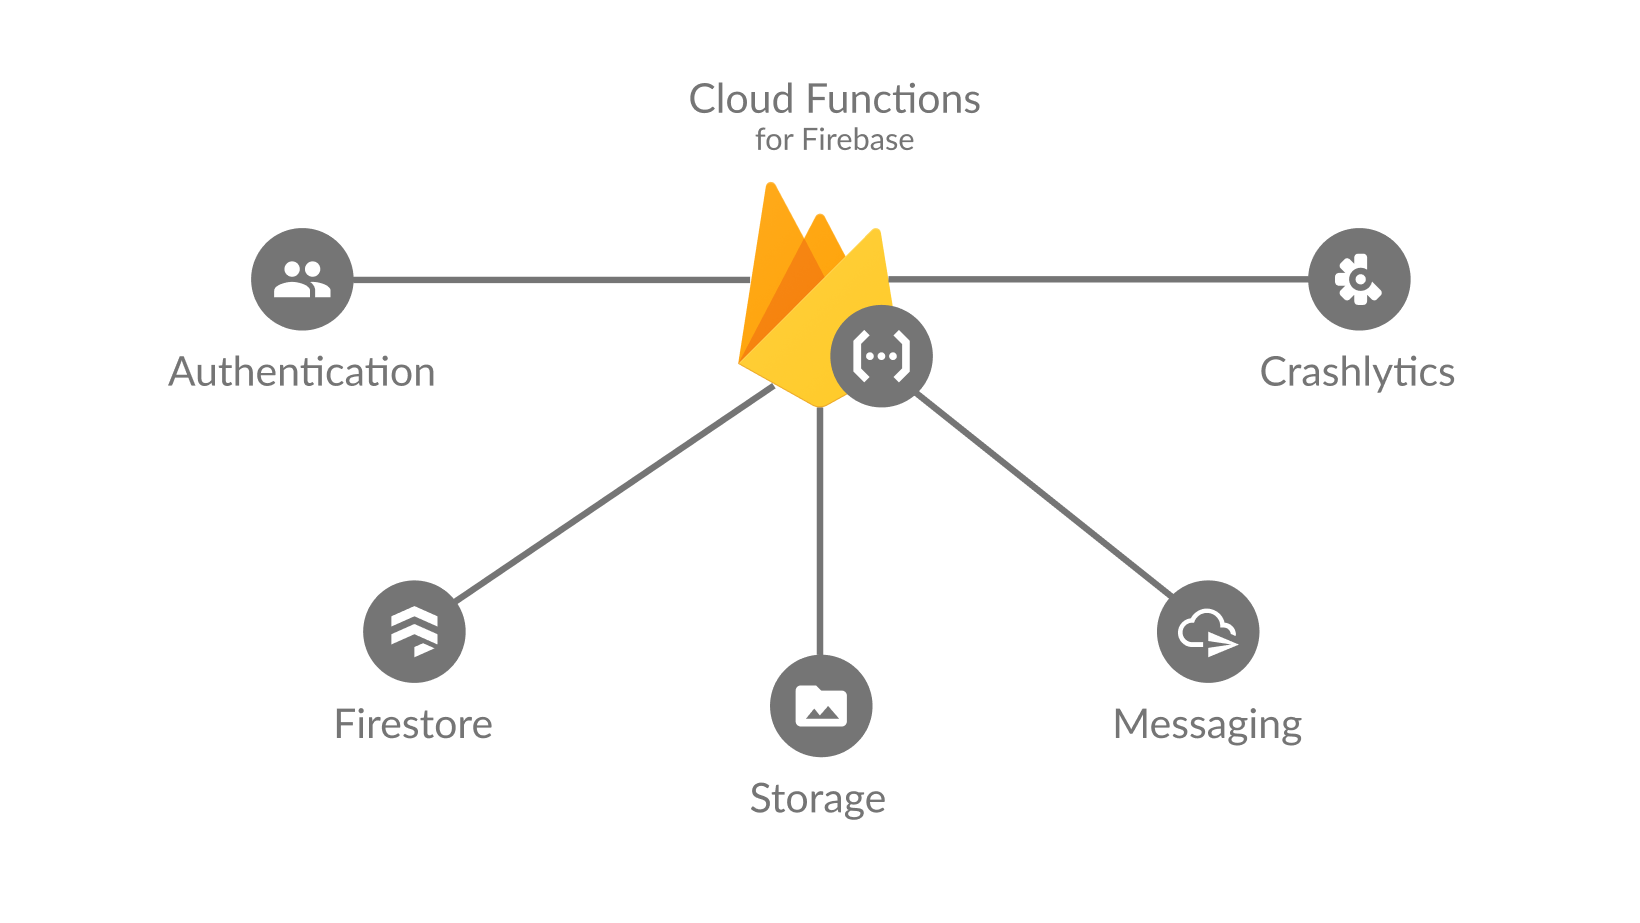
Cloud Functions are well suited for these scenarios as they allow us to access all the Firebase services securely and give us greater control and flexibility over a client-side implementation.
But developing Cloud Functions for Firebase is quite different from building a client app in Flutter.
First of all, we have to write them with JavaScript or TypeScript (the officially supported languages), rather than Dart.
And as I have covered in my Firebase Cloud Functions introduction, Cloud Functions are triggered in response to events.

This means that Cloud Functions need to be approached with a different mindset.
So in this tutorial, we'll learn how to use them to build a simple mood tracking application.
And we'll also setup and run the Firebase Local Emulator to speed up development, so that we don't have to deploy our functions every time we make a change.
Mood Tracking App Preview
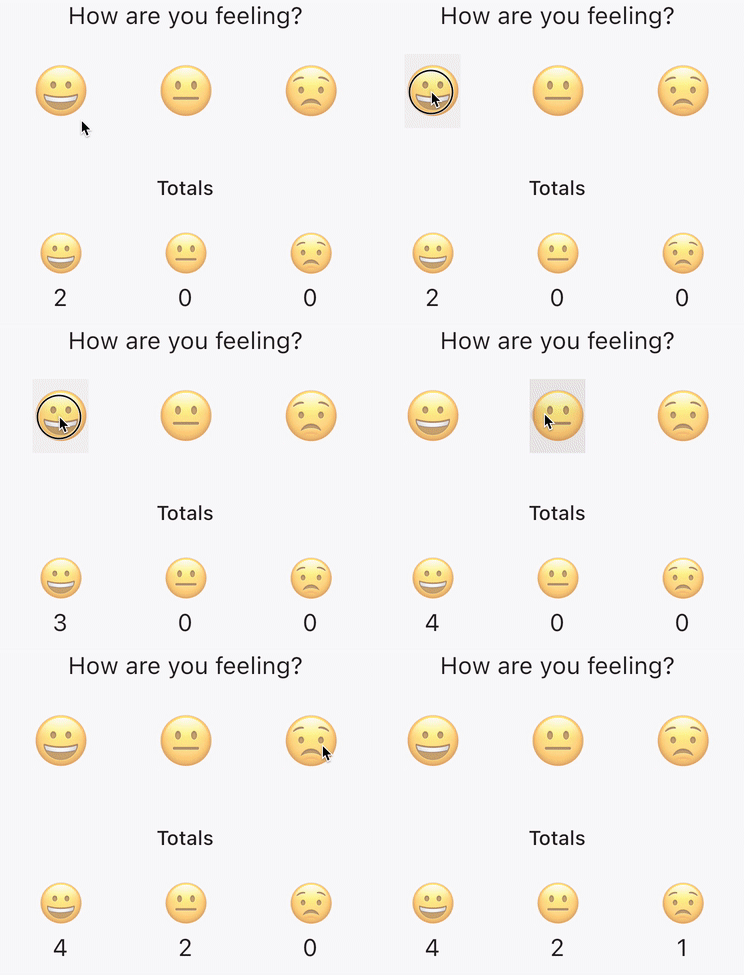
Here's a preview of the app we'll build:

Here's how this works:
- every time we click one of the moods (happy, neutral, sad), we add a new document to Firestore with the corresponding value (for example,
{'mood': '😀'}). - in turn, this triggers a Cloud Function that recalculates all the totals and writes them to a separate Firestore document.
- finally, the client app listens to the totals and updates the counters in realtime.
Note that this example is for illustration purposes and could be implemented in a simpler way. I've set things up this way to show how Cloud Functions work in combination with Cloud Firestore.
Let's dive into the code. We'll look at the Flutter code first, then at the Cloud Functions. Finally, we'll run things with the Firebase Local Emulator and complete the client app.
We'll focus on the Firestore-specific code for the rest of this tutorial. The entire project is available on GitHub and is already configured to run with Firebase.
Flutter Client Code
Let's start with a FirebaseMoodRepository class that we'll use to talk to Firebase:
class FirebaseMoodRepository {
  FirebaseMoodRepository(this._firestore);
  final FirebaseFirestore _firestore;

  @override
  Future<void> addMood(String mood) async {
    final ref = _firestore.collection('mood');
    await ref.add({'mood': mood});
  }
}
For the time being, we only need the addMood method.
When any of the emoji buttons are pressed, we call this method and pass the corresponding string value ('😀', '😐', '😟').
This method gets a reference to the mood collection and adds a new document with a single key-value pair.
Next up, we need to setup a Cloud Function to calculate the totals.
Firebase Cloud Functions Setup
Before we can run any code, we need to create a local Firebase project. If you're not familiar with this, you can follow my guide here:
Note: When creating the project with
firebase init, make sure to select both Firestore and Functions from the interactive prompt.
Once this is done, we'll have a functions/src/index.ts file that we can use to write the function we need.
Cloud Function to update the totals
Next up, let's replace the entire contents of functions/src/index.ts with this code:
import * as admin from 'firebase-admin'
import * as functions from 'firebase-functions'

// 1. don't forget to initialize the admin SDK
admin.initializeApp();

// 2. this Cloud Function will be triggered
// when a document is created inside mood/{moodId}
// and call the updateCounters() method below
exports.updateMoodCounters = functions.firestore
    .document('mood/{moodId}').onCreate((_, __) => updateCounters());

// 3. this is where all the business logic goes
async function updateCounters() {
    // setup all counters to 0
    var positive = 0
    var neutral = 0
    var negative = 0
    // get the collection data located at `mood`
    const firestore = admin.firestore()
    const collection = await firestore.collection(`mood`).get()
    // iterate through all the documents
    for (const doc of collection.docs) {
        // extract the mood value
        // note: this code uses *destructuring*
        const { mood } = doc.data()
        // update the counters
        if (mood === '😀') {
            positive++
        } else if (mood === '😐') {
            neutral++
        } else if (mood === '😟') {
            negative++
        }
    }
    // log the values (for debugging purposes)
    console.log({
        'positive': positive,
        'neutral': neutral,
        'negative': negative,
    })
    // write the updated counters to `totals/mood`
    return await firestore.doc(`totals/mood`).set({
        'positive': positive,
        'neutral': neutral,
        'negative': negative,
    })
}
A few notes:
- at the top, we call
admin.initializeApp(), as we will need this to use the admin SDK - we register a Cloud Function that will be triggered when a document is created inside
mood/{moodId} - inside
updateCounters(), we loop through all the documents, calculate the updated totals, and write them tototals/mood
That's it! This is all the code we need to update the totals in Firestore.
But how do we run it?
Running the Cloud Function
If we want to run this code in production, we need to deploy our new function. This is a good way to go once we're confident that our code works.
But it's not practical to deploy our functions every time we make a change. Not to mention that we need to register for the Firebase Blaze plan (and enter our credit card details) if we want to run any functions on the server.
For testing purposes, it's much quicker to run everything with the Firebase Local Emulator.
So let's set this up.
Using the Firebase Local Emulator with Flutter
The Firebase Local Emulator is available as part of the Firebase command line tools and allows us to choose which Firebase services we want to emulate locally.
We can even mix-and-match things and run Cloud Functions locally while saving data with the production DB.
For a good overview of how to set this up, see the official documentation.
The bottom line is that we can run firebase init emulators to choose which emulators we want to use:
=== Emulators Setup
? Which Firebase emulators do you want to set up? Press Space to select emulators, then Enter to confirm your choices. (Press <space> to select, <a> to toggle all
, <i> to invert selection)
❯◯ Authentication Emulator
 ◉ Functions Emulator
 ◉ Firestore Emulator
 ◯ Database Emulator
 ◯ Hosting Emulator
 ◯ Pub/Sub Emulator
 ◯ Storage Emulator
After running this command, we'll see that the selected emulators are listed in the firebase.json file:
{
  "emulators": {
    "functions": {
      "port": 8081
    },
    "firestore": {
      "port": 8080
    }
  }
}
We can then make a note of these ports and setup our Flutter app to use the emulators.
To do this, we can add the following code inside main.dart:
void main() async {
  WidgetsFlutterBinding.ensureInitialized();
  // standard Firebase setup
  await Firebase.initializeApp();
  // Use local Firestore emulator
  final firestore = FirebaseFirestore.instance;
  firestore.settings =
      const Settings(persistenceEnabled: false, sslEnabled: false);
  firestore.useFirestoreEmulator('localhost', 8080);
  runApp(const ProviderScope(child: MyApp()));
}
In this case, we tell Firebase to use the Firestore emulator on localhost at port 8080 (rather than using the production DB).
Starting the local emulator
Two more steps to go:
- run
npm run buildfrom thefunctionsfolder to compile our Cloud Function - run
firebase emulators:startto start the emulators.
This should give us the following output:
i  emulators: Starting emulators: functions, firestore
⚠  functions: The following emulators are not running, calls to these services from the Functions emulator will affect production: auth, database, hosting, pubsub, storage
✔  functions: Using node@14 from host.
i  firestore: Firestore Emulator logging to firestore-debug.log
⚠  ui: Emulator UI unable to start on port 4000, starting on 4002 instead.
i  ui: Emulator UI logging to ui-debug.log
i  functions: Watching "/Users/andrea/work/codewithandrea/github/flutter/mood_tracker_flutter/functions" for Cloud Functions...
✔  functions[us-central1-updateMoodCounters]: firestore function initialized.

┌─────────────────────────────────────────────────────────────┐
│ ✔  All emulators ready! It is now safe to connect your app. │
│ i  View Emulator UI at http://localhost:4002                │
└─────────────────────────────────────────────────────────────┘

┌───────────┬────────────────┬─────────────────────────────────┐
│ Emulator  │ Host:Port      │ View in Emulator UI             │
├───────────┼────────────────┼─────────────────────────────────┤
│ Functions │ localhost:8081 │ http://localhost:4002/functions │
├───────────┼────────────────┼─────────────────────────────────┤
│ Firestore │ localhost:8080 │ http://localhost:4002/firestore │
└───────────┴────────────────┴─────────────────────────────────┘
  Emulator Hub running at localhost:4400
  Other reserved ports: 4500

Issues? Report them at https://github.com/firebase/firebase-tools/issues and attach the *-debug.log files.
Note that the functions[us-central1-updateMoodCounters] function has been initialized, which is what we want.
Running the Flutter app
If we run the app now, we can click on the emoji buttons and see that our Cloud Function invocations are printed to the console:
i  functions: Beginning execution of "us-central1-updateMoodCounters"
>  { positive: 0, neutral: 1, negative: 0 }
i  functions: Finished "us-central1-updateMoodCounters" in ~1s
i  functions: Beginning execution of "us-central1-updateMoodCounters"
>  { positive: 0, neutral: 2, negative: 0 }
i  functions: Finished "us-central1-updateMoodCounters" in ~1s
i  functions: Beginning execution of "us-central1-updateMoodCounters"
>  { positive: 1, neutral: 2, negative: 0 }
i  functions: Finished "us-central1-updateMoodCounters" in ~1s
i  functions: Beginning execution of "us-central1-updateMoodCounters"
>  { positive: 1, neutral: 3, negative: 0 }
i  functions: Finished "us-central1-updateMoodCounters" in ~1s
This confirms that everything works as expected.
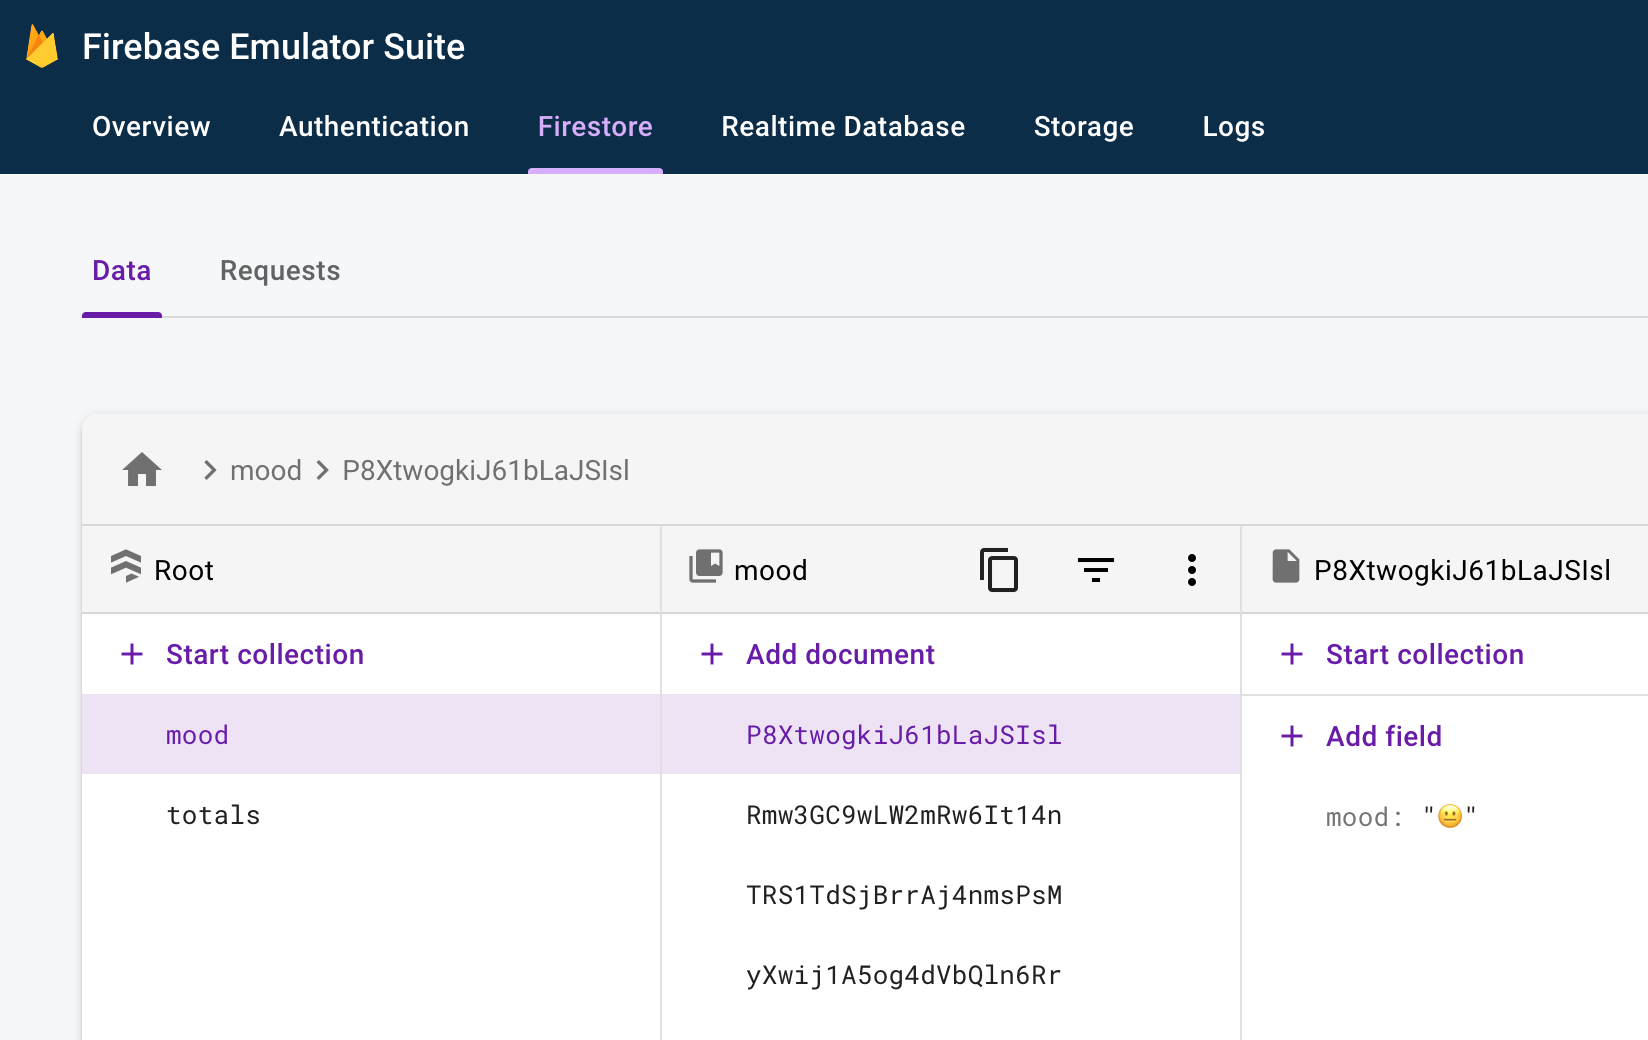
And if we open the Firebase Emulator UI and select the Firestore tab, we can see all the data:

Completing the Flutter app
The last thing to do is to write some more Dart code to get the totals and show them in the UI.
Showing the Totals
As we are good programmers, we can define a type-safe model class to represent the mood totals:
class MoodTotals {
  MoodTotals({
    required this.positive,
    required this.neutral,
    required this.negative,
  });
  final int positive;
  final int neutral;
  final int negative;

  // helper method to be used when there is no data
  MoodTotals.zero()
      : positive = 0,
        neutral = 0,
        negative = 0;

  Map<String, dynamic> toMap() {
    return {
      'positive': positive,
      'neutral': neutral,
      'negative': negative,
    };
  }

  factory MoodTotals.fromMap(Map<String, dynamic>? map) {
    // this will be null if the totals were never written before
    if (map == null) {
      // hence, return all zeros
      return  MoodTotals.zero();
    }
    // else, parse the values from the map
    return MoodTotals(
      positive: map['positive'],
      neutral: map['neutral'],
      negative: map['negative'],
    );
  }

  @override
  String toString() =>
      'Mood(positive: $positive, neutral: $neutral, negative: $negative)';
}
Then we can update our FirebaseMoodRepository like so:
class FirebaseMoodRepository {
  FirebaseMoodRepository(this._firestore);
  final FirebaseFirestore _firestore;

  @override
  Future<void> addMood(String mood) async {
    final ref = _firestore.collection('mood');
    await ref.add({'mood': mood});
  }

  @override
  Stream<MoodTotals> moodTotals() {
    final ref = _firestore.doc('totals/mood').withConverter(
        fromFirestore: (doc, _) => MoodTotals.fromMap(doc.data()),
        toFirestore: (MoodTotals mood, options) => mood.toMap());
    return ref
        .snapshots()
        // return snapshot.data() or fallback if the document doesn't exist
        .map((snapshot) => snapshot.data() ?? MoodTotals.zero());
  }
}
A few things to note about the moodTotals method:
- we read the document data inside
totals/mood. This is exactly the document our Cloud Function writes to. - we use
withConverterto serialize the documents data. - we map over
ref.snapshots()to extract the data from each snapshot, usingMoodTotals.zero()as a fallback if the document doesn't exist.
This completes our FirestoreDatabase implementation and we just need to use the new Stream to rebuild our UI in realtime. I won't cover this here but you can find the full source code on GitHub.
And voilà, our app now works as intended:

Conclusion
Our app is now complete and we have learned some very useful stuff:
- How to write Cloud Functions in response to Firestore triggers
- How to setup and run the Firebase Local Emulator
- How to read and write Firestore data using type-safe model classes and converters.
This simple example gives us a good starting point for creating more complex apps with Cloud Functions. And by using the Firebase Local Emulator we get some productivity gains too.
References
Here are some additional guides I found useful while preparing this tutorial:
- Introduction to Firebase Local Emulator Suite
- Connect your app and start prototyping
- Install, configure and integrate Local Emulator Suite
- Run functions locally
- Use TypeScript for Cloud Functions
Happy coding!


