This is a free lesson from my Flutter Animations course, where you'll learn how to build a completely custom habit tracking app.
Micro-interactions are great! They can enhance the user experience in our apps and delight our users.
And when the built-in Flutter widgets are not enough, CustomPainter comes to the rescue!
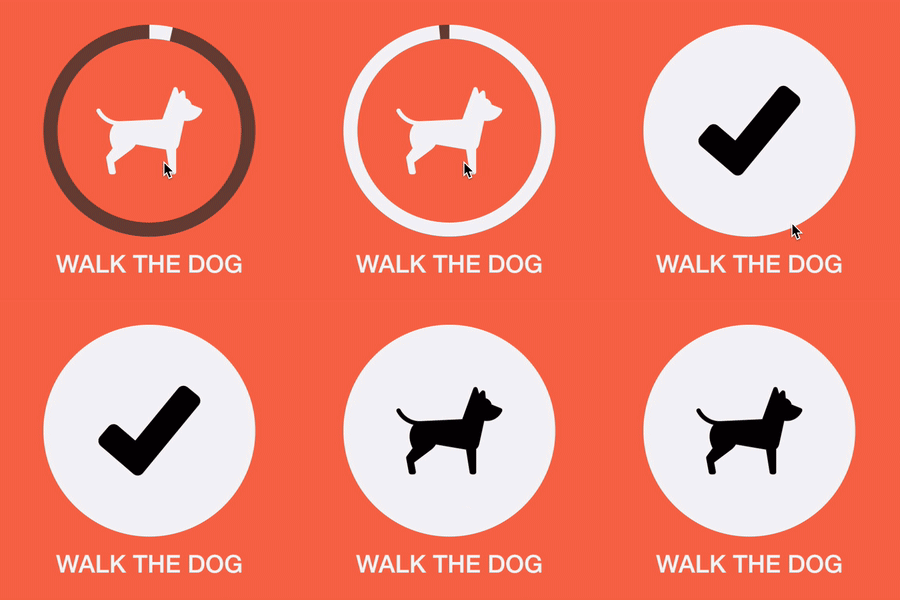
So let's see how to use it to draw the UI for this animated task completion ring:

This animated sequence is composed of multiple stages:
- show the non-completed task UI
- gradually fill the ring when we tap and hold on the task
- show a checkmark icon for confirmation
- show the completed task UI
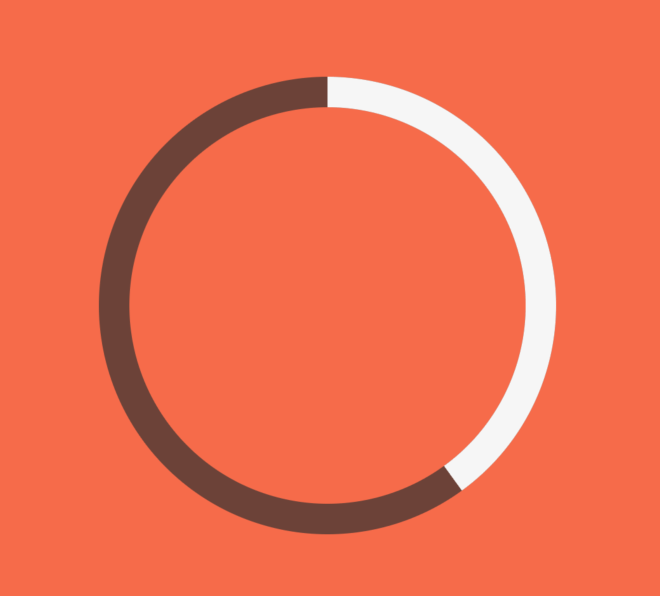
In particular, this "partially completed" ring UI is not something that we can create using the built-in widgets in the Flutter SDK:

Instead, we need to use a CustomPainter and this free lesson covers all the details:
Key Points
The task completion ring can be represented as a StatelessWidget subclass with an AspectRatio and a CustomPaint child:
class TaskCompletionRing extends StatelessWidget {
  @override
  Widget build(BuildContext context) {
    return AspectRatio(
      // Use 1.0 to ensure that the custom painter
      // will draw inside a container with width == height
      aspectRatio: 1.0,
      child: CustomPaint(
        painter: RingPainter(),
      ),
    );
  }
}
Then we can add a CustomPainter subclass and override the paint() and shouldRepaint() methods:
class RingPainter extends CustomPainter {
  @override
  void paint(Canvas canvas, Size size) {}

  @override
  bool shouldRepaint(covariant CustomPainter oldDelegate) => true;
}
The paint() method has two arguments:
- a
canvasobject that we can use to draw things - a
sizeobject that tells us how big is the drawing area
The shouldRepaint() method should return true when something has changed (we'll get back to this later).
Implementing the RingPainter
This video shows how to complete our completion ring UI:
By the end of the lesson, we're able to draw this circular ring:

This is implemented like this:
class RingPainter extends CustomPainter {
  // 1. add a constructor and properties that can be set from the parent widget
  RingPainter({
    required this.progress,
    required this.taskNotCompletedColor,
    required this.taskCompletedColor,
  });
  // a value between 0 and 1
  final double progress;
  // background color to use when the task is not completed
  final Color taskNotCompletedColor;
  // foreground color to use when the task is completed
  final Color taskCompletedColor;

  @override
  void paint(Canvas canvas, Size size) {
    // 2. configure the paint and drawing properties
    final strokeWidth = size.width / 15.0;
    final center = Offset(size.width / 2, size.height / 2);
    final radius = (size.width - strokeWidth) / 2;

    // 3. create and configure the background paint
    final backgroundPaint = Paint()
      ..isAntiAlias = true
      ..strokeWidth = strokeWidth
      ..color = taskNotCompletedColor
      ..style = PaintingStyle.stroke;
    // 4. draw a circle
    canvas.drawCircle(center, radius, backgroundPaint);

    // 5. create and configure the foreground paint
    final foregroundPaint = Paint()
      ..isAntiAlias = true
      ..strokeWidth = strokeWidth
      ..color = taskCompletedColor
      ..style = PaintingStyle.stroke;
    // 6. draw an arc that starts from the top (-pi / 2)
    // and sweeps and angle of (2 * pi * progress)
    canvas.drawArc(
      Rect.fromCircle(center: center, radius: radius),
      -pi / 2,
      2 * pi * progress,
      false,
      foregroundPaint,
    );
  }

  // 7. only return true if the old progress value
  // is different from the new one
  @override
  bool shouldRepaint(covariant RingPainter oldDelegate) =>
      oldDelegate.progress != progress;
}
Note the use of the
covariantkeyword when overriding theshouldRepaint()method. This is so thatoldDelegatecan be declared with typeRingPaintereven though it's declared asCustomPainterin the base class.
Key Points
- we can implement a
CustomPainterwhen any of the existing Flutter widgets are not enough for our purposes. - when extending the
CustomPainterclass we have to implement thepaint()andshouldRepaint()methods. - the
paint()method gives us acanvasthat we can use to draw shapes. All the draw methods that are available take aPaintobject that we can use to customise the appearance of our shapes. - if we want to draw shapes that are relative to the size of the parent widget, we can create variables that depend on the
sizeargument, - we can make our painters customisable by passing some values as arguments, just like we would do if we were creating custom widgets.
- we can implement the
shouldRepaint()method in such a way that it only returnstruewhen something changes, and this helps with performance.
Bonus: Here's a full tutorial on how to use CustomPainter:
In the next lesson, we'll see how to implement the task animation using AnimationController.
Flutter Animations Course
If you're serious about animations and want to learn how to use them in a real-world app, check out my complete Flutter Animations course.
This will teach you how to build a habit-tracking application with completely custom UI and animations. And it includes 7 hours of in-depth content, full source code, extra challenges & much more.

Happy coding!


